Window installations are one of the most vulnerable areas of the building envelope. After all, they are, at the basic level, giant holes in an otherwise mostly solid structure. Failure to integrate, wrap, and flash window openings properly can allow moisture into the system, leading to long-term issues including rotting frames and mold.
The good news is that it’s easy to follow the science. Manufacturers and construction experts have determined the best ways to protect window openings—and the building envelope as a whole—through a systems-based approach and installation best practices focused on proper sequencing and sealing.
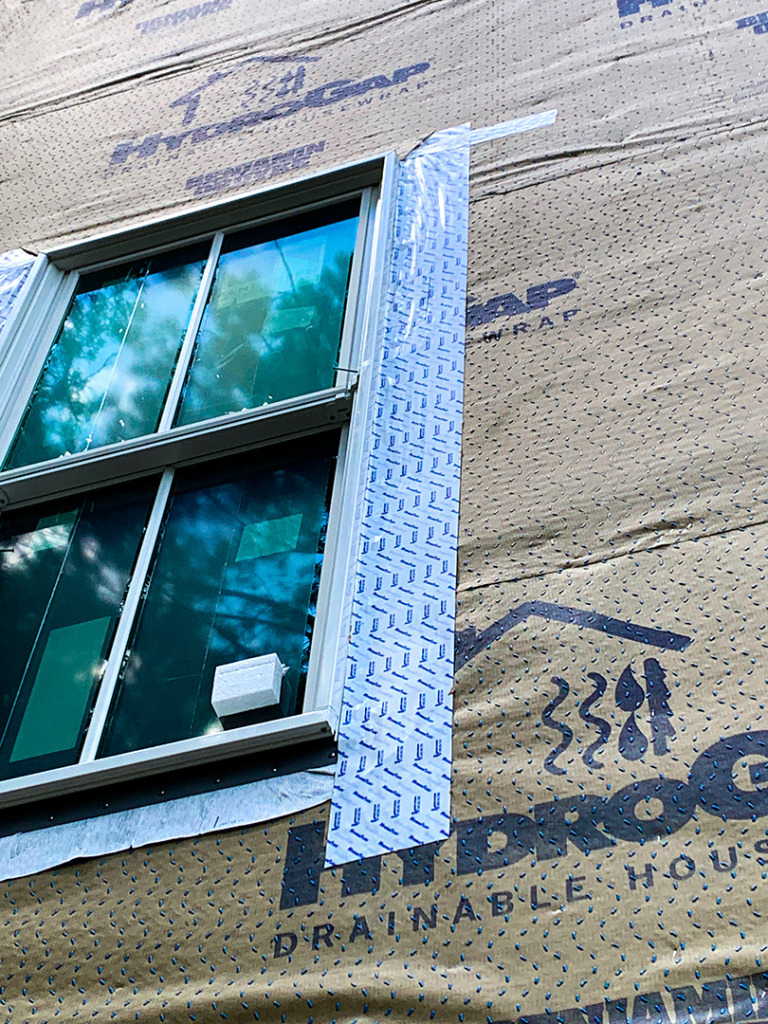
As one example, here is a step-by-step process for properly installing HydroGap SA® self-adhered drainable housewrap around window openings.
Self-Adhered Housewrap Around Window Installations
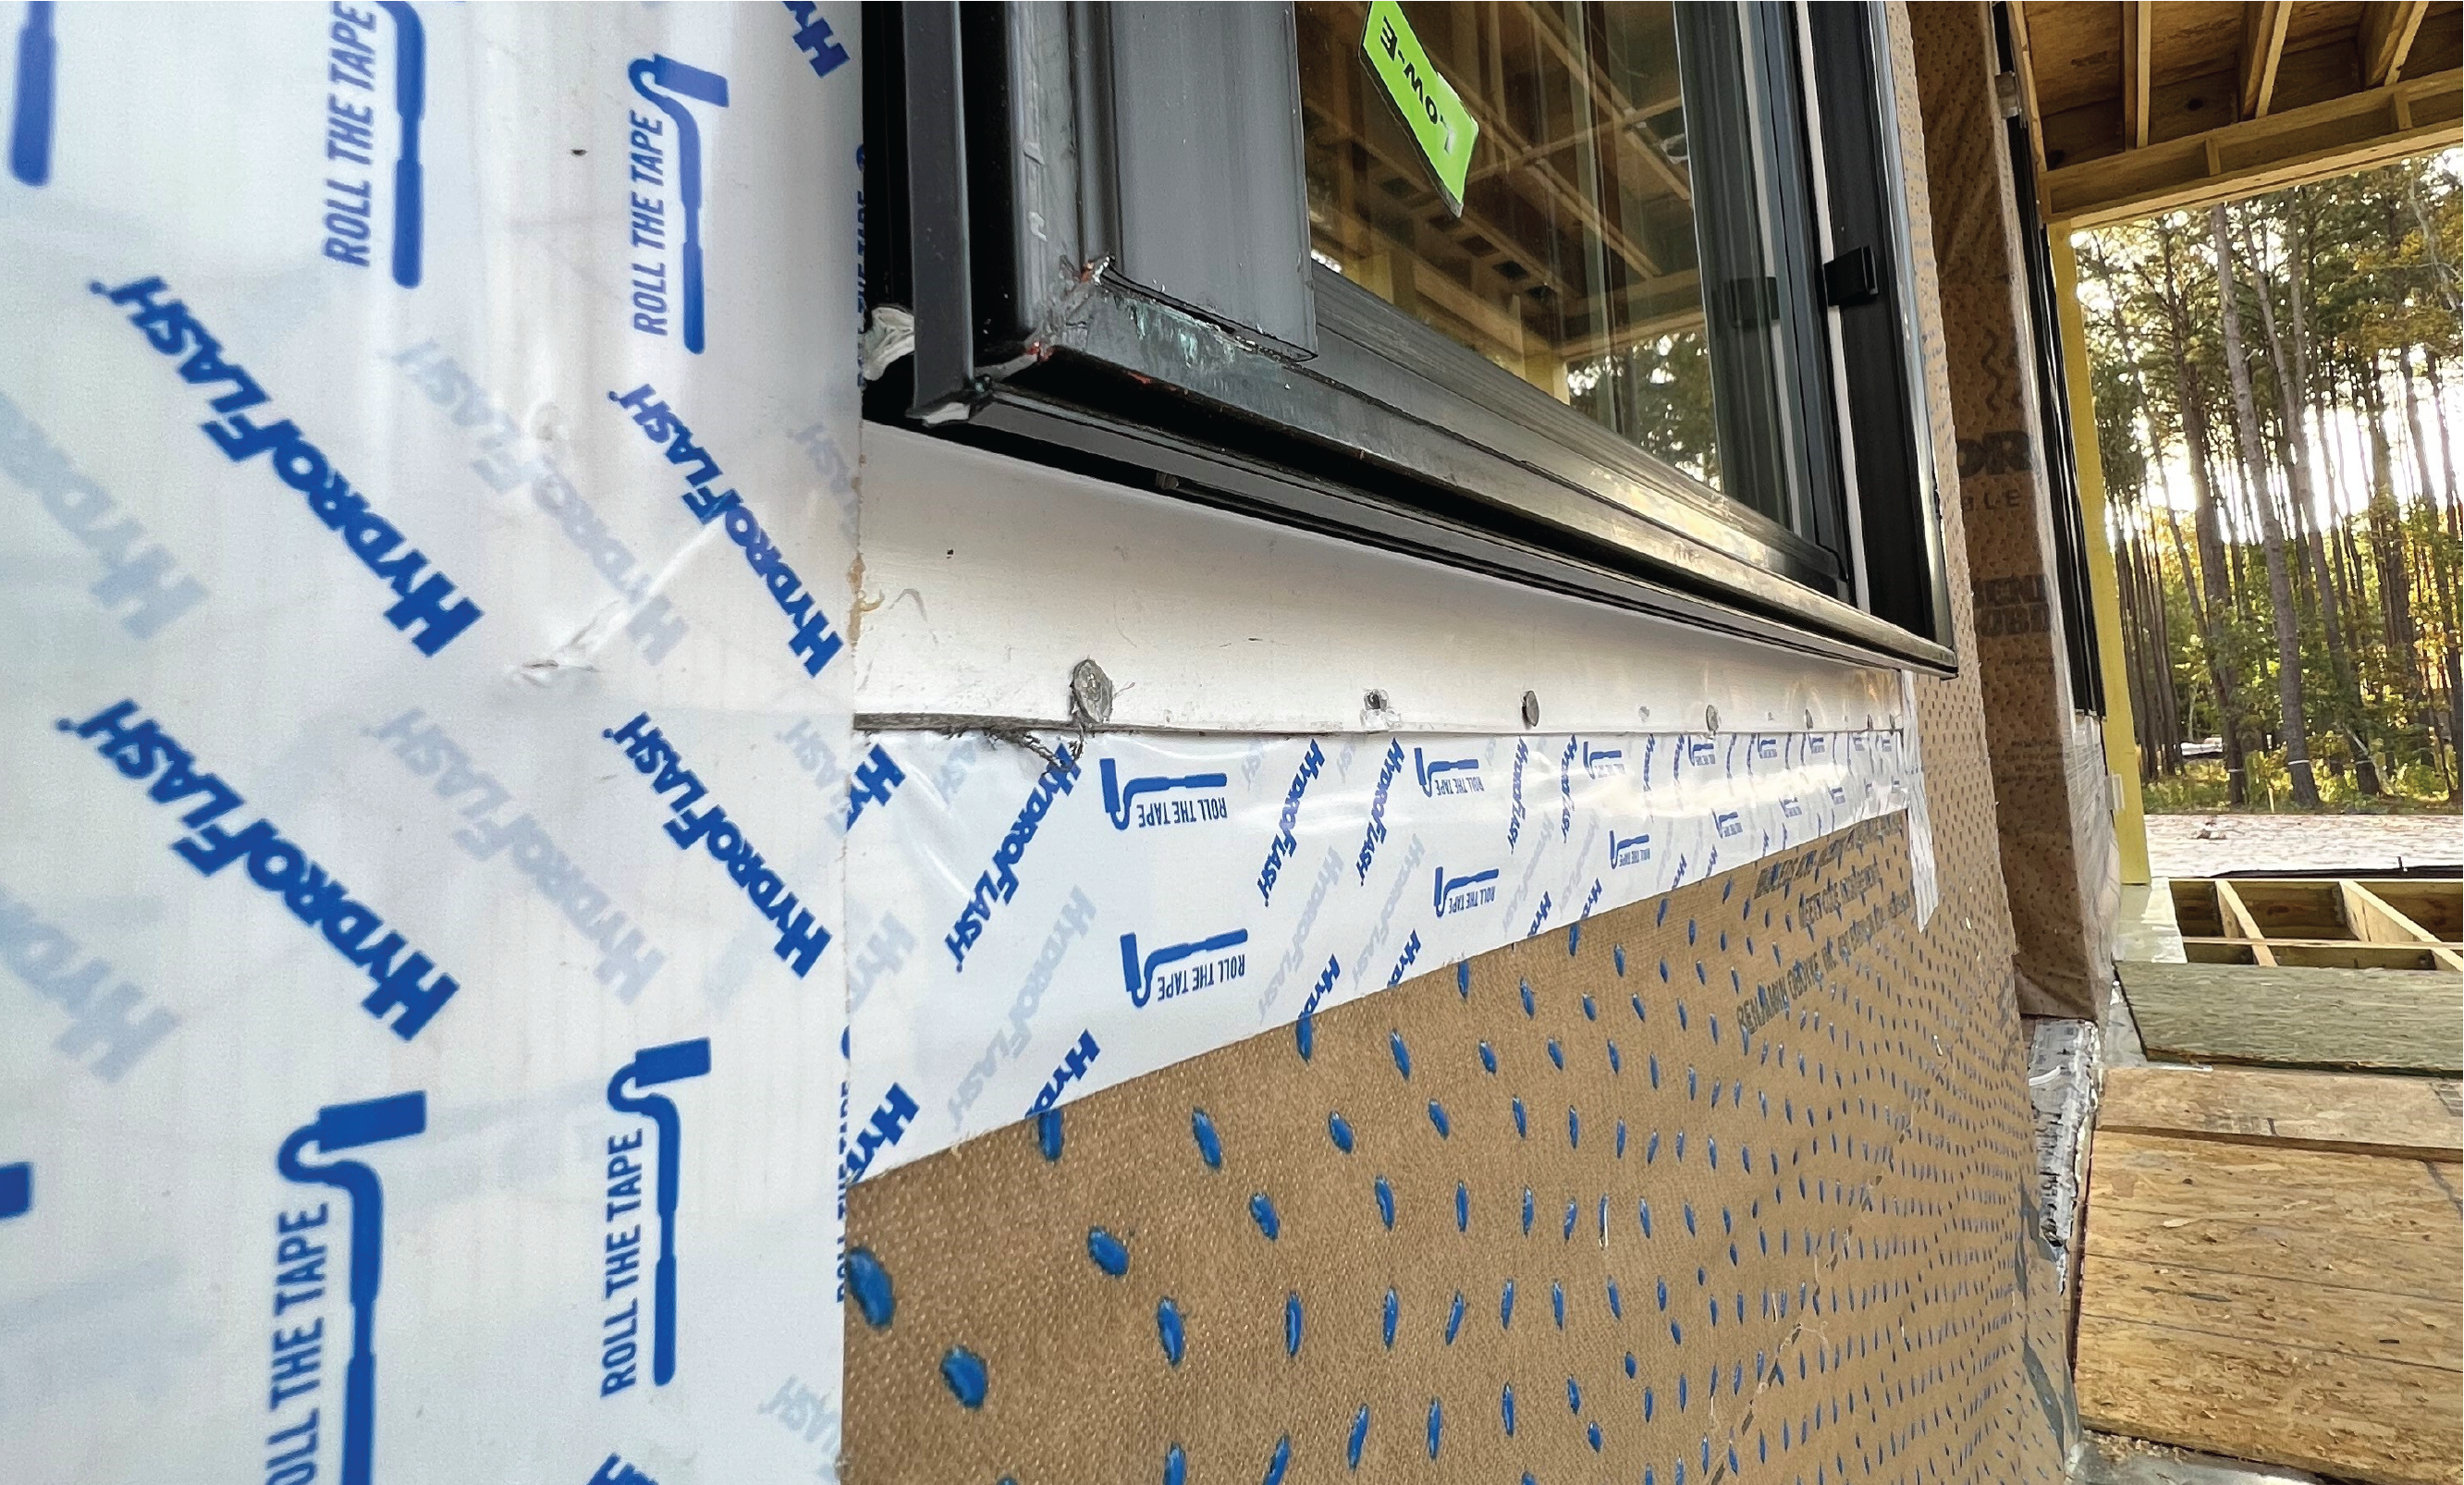
Be sure to follow all manufacturer instructions for housewrap and flashing integration with window installations. As you’re applying the self-adhered housewrap, following proper sequencing starting at the bottom, you’ll be covering window openings in the process.
However, unlike the rest of the structure where you’ll be applying pressure to engage the acrylic adhesive, avoid rolling/applying pressure to the top of windows and doors; this will allow for proper shingle lapping of self-adhered flashing tape when you install the windows.
Once the housewrap application is complete, follow these steps to create a drainable window assembly:
- At each window opening, cut an “I” shape into the housewrap. Cut housewrap above the top corners 45 degrees away from the window opening to account for flashing width.
- Fold the side flaps into the rough opening. Cut and apply pressure, allowing the adhesive to stick to the jambs.
- Fold up the top trapezoid-shaped “flap” and stick a strip of precut release liner underneath to keep the flap from sticking to the sheathing.
- Using a hand applicator, apply HydroFlash® GP to the exterior of the sill, extending 6″ past each jamb.
HydroFlash® Samples
GET YOUR FREE HYDROFLASH® SAMPLES TODAY
Next, work on the window sill details.
- As a first optional step, install a sloped sill or back dam (optimal slope .25”), except when using an approved pre-manufactured sill pan.
- To properly flash the sill, cut and install corner patch flashing or use HydroCorners®*.
- Install HydroFlash 9” to extend at least 6 inches up the side of each jamb inside window opening.
- If you opt for 6” HydroFlash at the sill instead, two pieces must be used: one piece flush with the sill edge and the other folded into the sill.
- All flashing should be installed using firm pressure with a hand applicator.
*To use HydroCorners instead of patches, place a HydroCorner in each sill corner and fasten in place with a staple. Install HydroFlash 9” to extend at least 6 inches up the inside of each jamb inside the window opening.
Finally, complete the process and install the window:
- Apply caulk/sealant at jambs and head. Do not caulk at the window sill.
- Install the flanged window. Install HydroFlash to the side jambs with a hand applicator. Ensure the surface is clean and dry.
- Apply HydroFlash header flashing with a hand applicator. Then install the drip cap if the design indicates.
- Fold the top flap down, removing the adhesive backer. Using a hand applicator, apply pressure to HydroGap SA, activating the acrylic adhesive over the head flashing.
- Apply HydroFlash at the diagonal relief cuts.
To see full instructions for installing HydroGap SA, download the instruction guide here.
Best Practices for Window Installations With Self-Adhered Housewrap
Along with following the step-by-step instructions for installing self-adhered housewrap, consider these reminders and best practices:
- Before applying any self-adhered housewrap or self-adhered flashing, ensure the surface is clean and free of debris, as well as dry. This will ensure the adhesive has full contact with the surface.
- Once the housewrap and flashing are in final position, apply pressure to fully activate the adhesive.
- Plan ahead: Before starting installation, discuss the whole-house game plan with all involved parties: What areas of the envelope are going to be tricky and what is the proper sequencing for them? In what order should materials be installed? How will different subs properly detail openings and penetrations? Ensure all installers understand the sequencing and proper details ahead of time—and that those plans are followed.
Ready to Build Better? Benjamin Obdyke Has the Support
As always, look to your manufacturer for support; Benjamin Obdyke can help you overcome design challenges and determine the ideal sequencing for your project. We also can provide training for installers in person and conduct virtual jobsite sessions.
Ready to get started? Schedule a virtual training session with Benjamin Obdyke experts.