Across the building envelope, every interruption to the plane is a potential trouble spot—a place for water to enter the system, become trapped, and possibly create long-term damage. On the roof, these problem areas are typically any penetration point, such as pipes or fireplace flues, and at the eaves where the roof system meets the wall system.
Understanding the proper ways to weatherize these areas is critical to ensure the long-term performance of the building envelope. Plan ahead, encourage communication with crews, and think of it as a system to help avoid issues.
Here are some strategies to keep in mind.
Properly Flashing Roof Penetrations
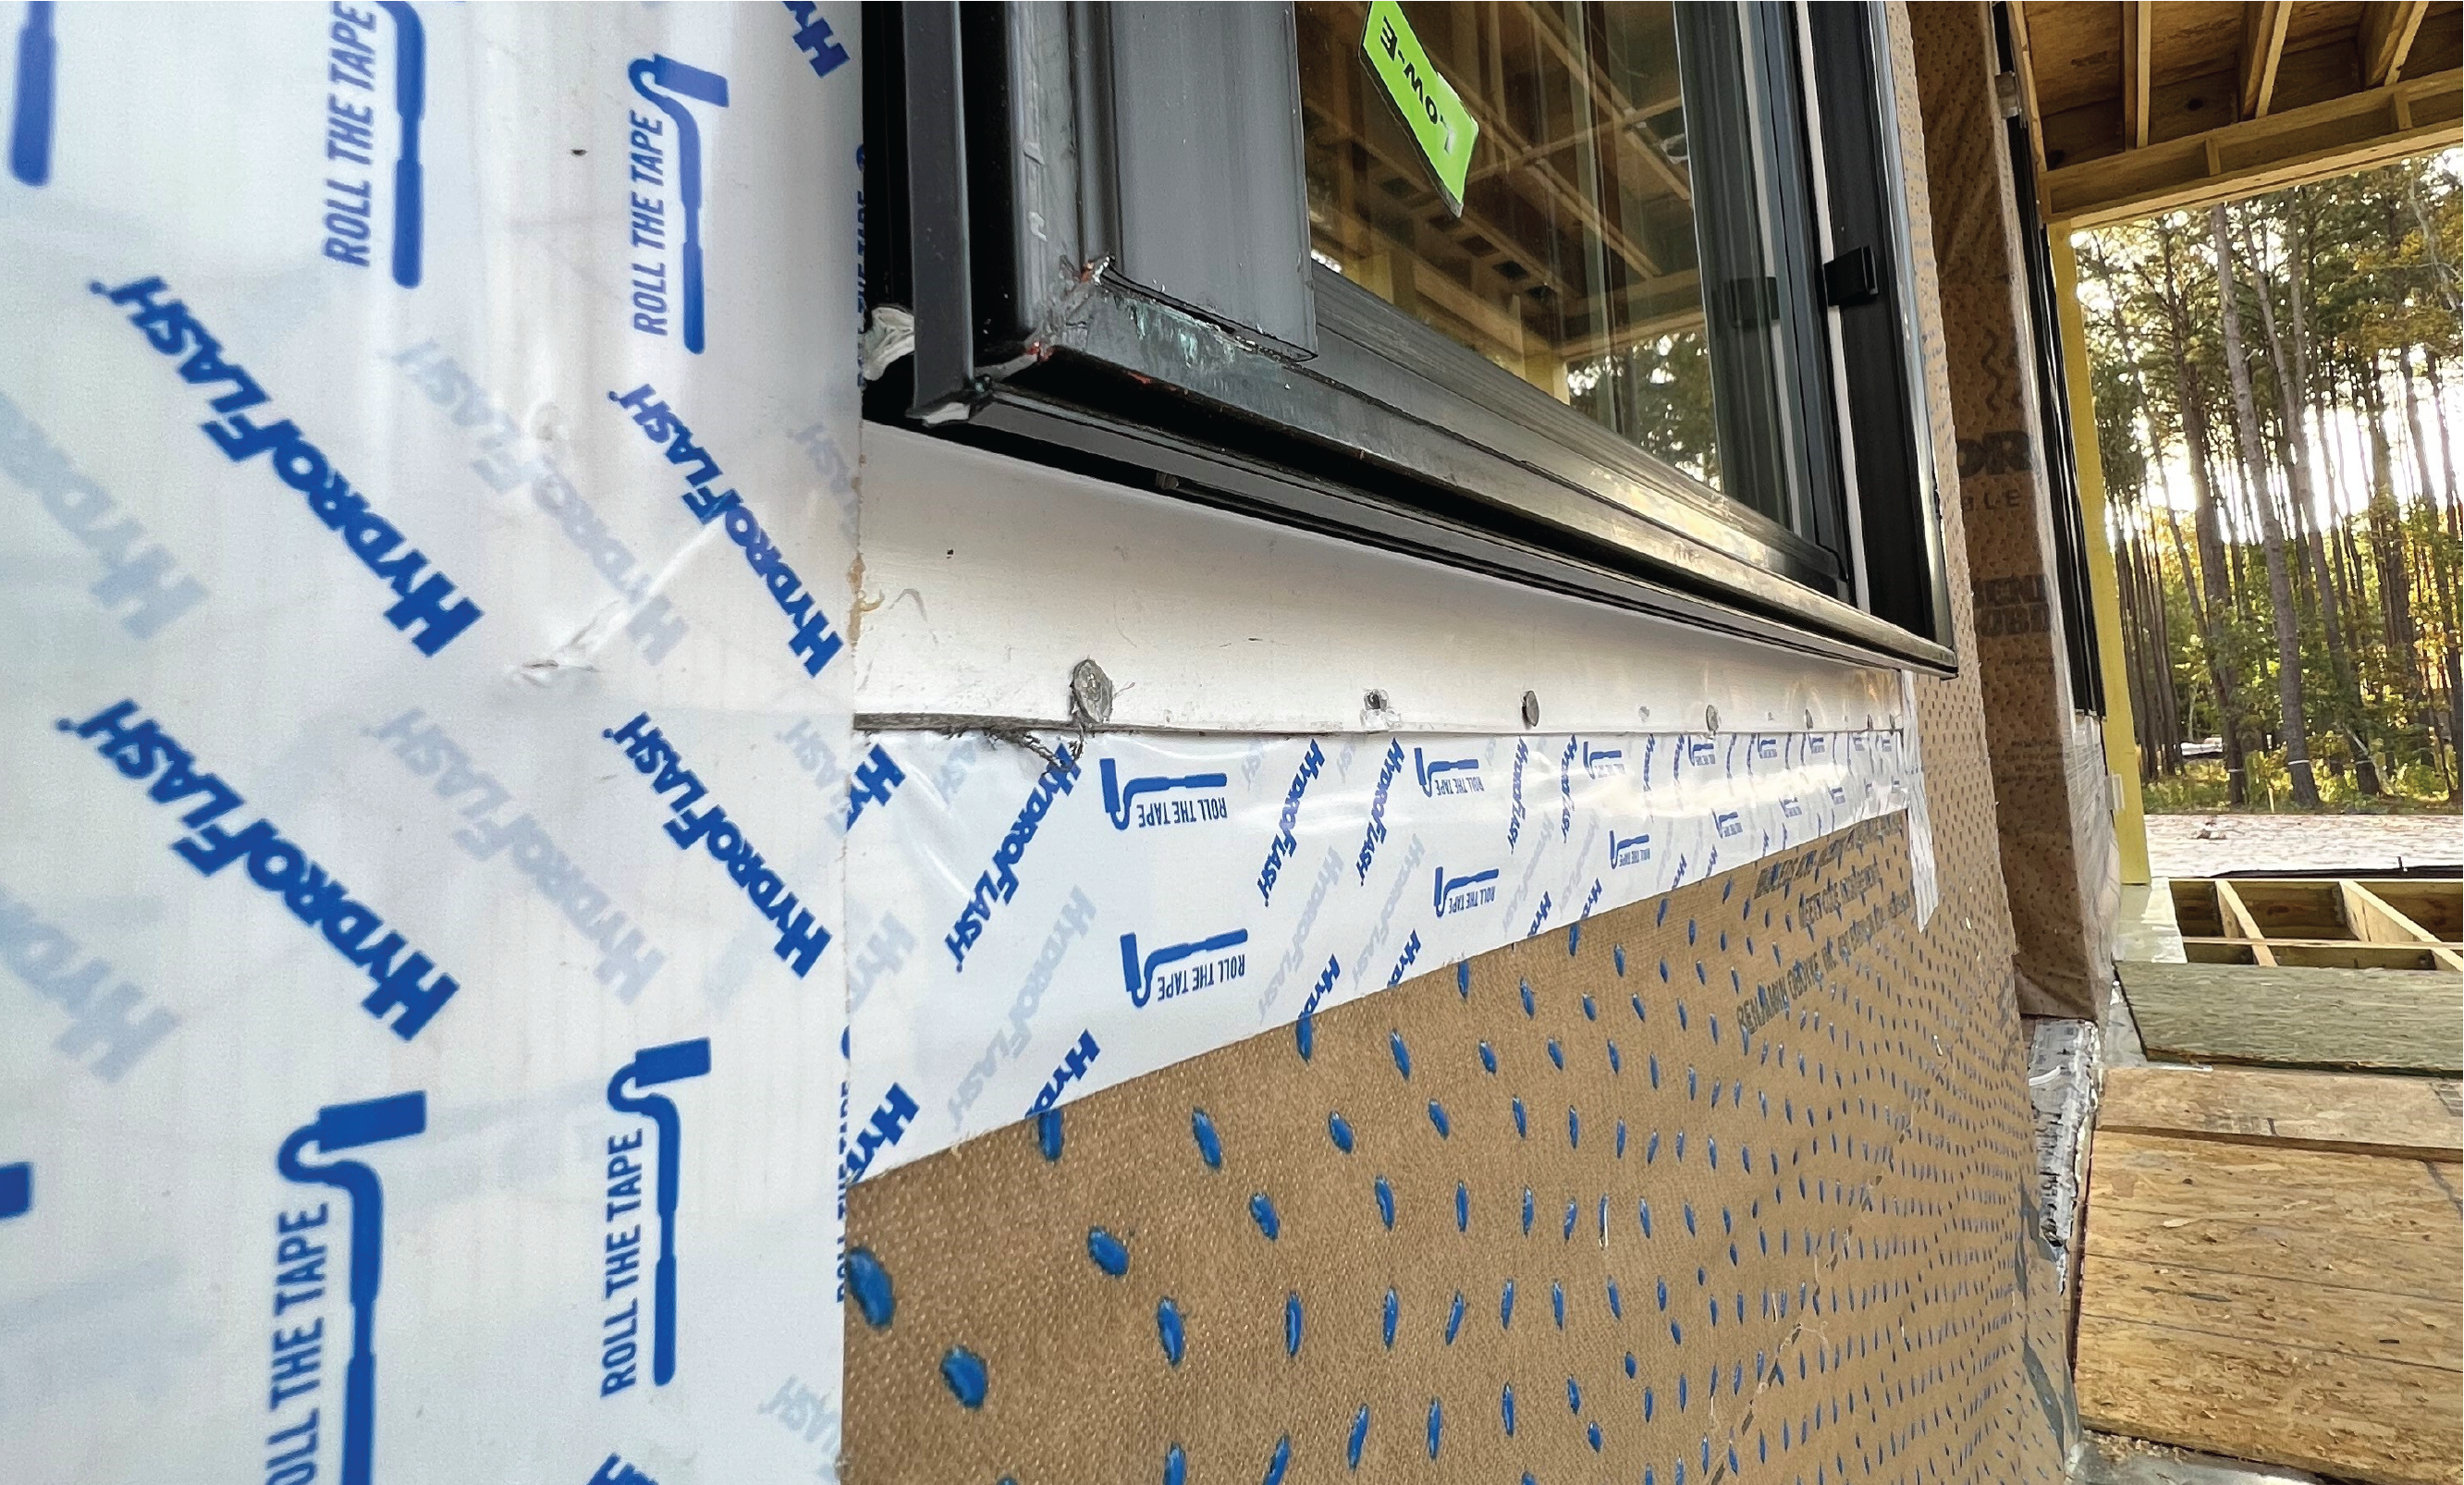
For common roof penetrations like pipes, use a flashing tape such as HydroFlash UV+ applied onto the roof deck and the penetrating component. A liquid flashing/sealant can also be used. With HydroFlash UV+, take multiple small cut pieces and work from the bottom up to maintain shingle overlapping; proper shingle-lapping, so that top layers overlap the layer below them, is essential to prevent water from getting behind the flashing. Keep it tight around the penetration with full contact and coverage.
Flashing is often skipped with pipe penetrations, since they typically incorporate a gasket, or collar, and installers assume that’s enough. However, pipe collars are one of the most common leak points in the roof, in part because they are made of rubber and may crack over time. So, it’s important to seal or flash directly at the penetration.
Finally, only specify products that are approved for the roof. Some sealants or tapes may not be designed for the higher temperatures of the roof or under certain materials. The sealant or flashing must also be compatible with the other materials on the roof it will come into contact with.
HydroFlash UV+, for example, is a high-performance tape formulated with acrylic adhesive for extreme environmental conditions, and it has a 12-month UV rating. The flashing is also vapor permeable, so it allows trapped moisture to dry toward the exterior of the envelope.
Properly Weatherizing Roof Eaves
Eaves are common failure points in cold climates due to ice damming. Ice dams occur when snow builds up on the roof, melts, runs down the shingles, and then re-freezes near the gutters and eaves. When this process repeats over and over again, ice at the eaves builds up, forming an ice dam that prevents water from draining. That buildup of trapped water may eventually pass through to the sheathing and even the home interior, leading to long-term issues like rot, decay, and mold.
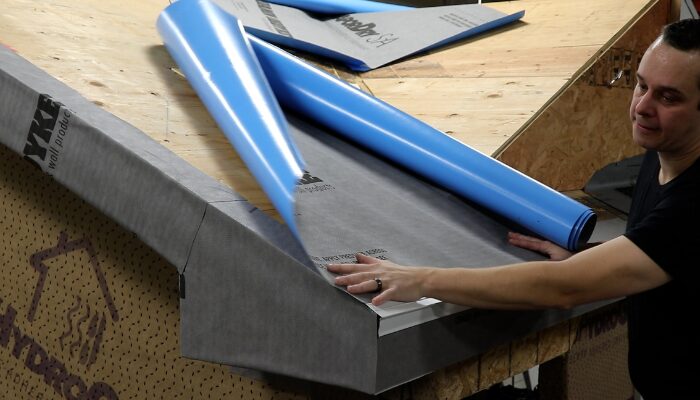
When ice dams do form, a self-adhered underlayment such as VaporDry SA can help prevent water build-up from reaching the interior. Along with serving as the moisture control layer, VaporDry SA’s continuous acrylic adhesive provides consistent nail sealing, helping to prevent water from getting through. In addition, the underlayment is vapor permeable, which allows the roof sheathing to dry to the exterior if it were to become wet from rising interior moisture.

VaporDry® SA Samples
GET YOUR FREE VAPORDRY® SA SAMPLES TODAY
Here’s how to properly protect eaves:
- Install VaporDry SA directly to the subfascia and up the roof about 12 inches at the eaves, as ice damming can force its way up under metal drip edges. This will protect the wood structure from water damage.
- Install the metal drip edge on top of the underlayment.
- Install the first full course of VaporDry SA to shingle overlap the drip edge and adhere to the top edge of the partial width of VaporDry SA. Cover the rest of the roof using proper sequencing to ensure water has a proper drainage path and won’t become trapped behind the underlayment.
Watch an eave installation demo here:
Because crews may be different for the walls and the roof, the roof-to-wall intersection is an area where pre-construction meetings and communication are critical to ensuring proper installation and sequencing. For example, who is installing the finish fascia and therefore required to ensure proper shingle overlapping between the roof underlayment and the housewrap? When will roof penetrations be added and how will that order impact the flashing around those areas?
Want to learn more about proper flashing for your projects? Schedule a virtual jobsite visit today!


